Key Indicators On Trade Set Up In General
1. Push Set Up
2. Range Set up
3. Break & Retest Set Up
Notes On Session
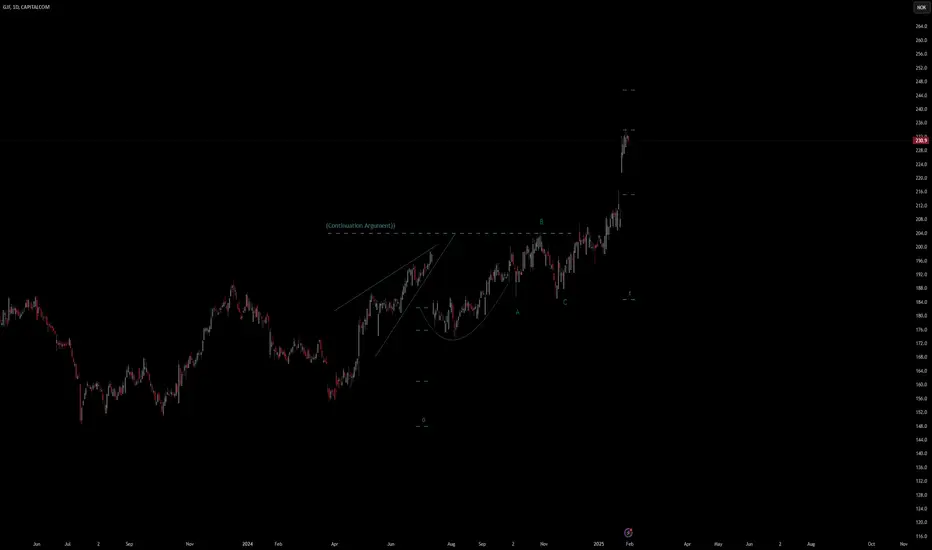
# GJF Stock Quote
- Double Formation
* (Continuation Argument)) At 206.0 NOK
* 1st Retracement | 0 & Entry Area | Subdivision 1
- Triple Formation
* ABC Flat Wave Count | Subdivision 2
* 2nd Retracement & Uptrend Bias | Subdivision 3
* Daily Time Frame | Trend Settings Condition
Active Sessions On Relevant Range & Elemented Probabilities;
European Session(Upwards) - US-Session(Downwards) - Asian Session(Ranging)
Conclusion | Trade Plan Execution & Risk Management On Demand;
Overall Consensus | Buy
1. Push Set Up
2. Range Set up
3. Break & Retest Set Up
Notes On Session
# GJF Stock Quote
- Double Formation
* (Continuation Argument)) At 206.0 NOK
* 1st Retracement | 0 & Entry Area | Subdivision 1
- Triple Formation
* ABC Flat Wave Count | Subdivision 2
* 2nd Retracement & Uptrend Bias | Subdivision 3
* Daily Time Frame | Trend Settings Condition
Active Sessions On Relevant Range & Elemented Probabilities;
European Session(Upwards) - US-Session(Downwards) - Asian Session(Ranging)
Conclusion | Trade Plan Execution & Risk Management On Demand;
Overall Consensus | Buy
Disclaimer
The information and publications are not meant to be, and do not constitute, financial, investment, trading, or other types of advice or recommendations supplied or endorsed by TradingView. Read more in the Terms of Use.
Disclaimer
The information and publications are not meant to be, and do not constitute, financial, investment, trading, or other types of advice or recommendations supplied or endorsed by TradingView. Read more in the Terms of Use.