AUDCAD D1
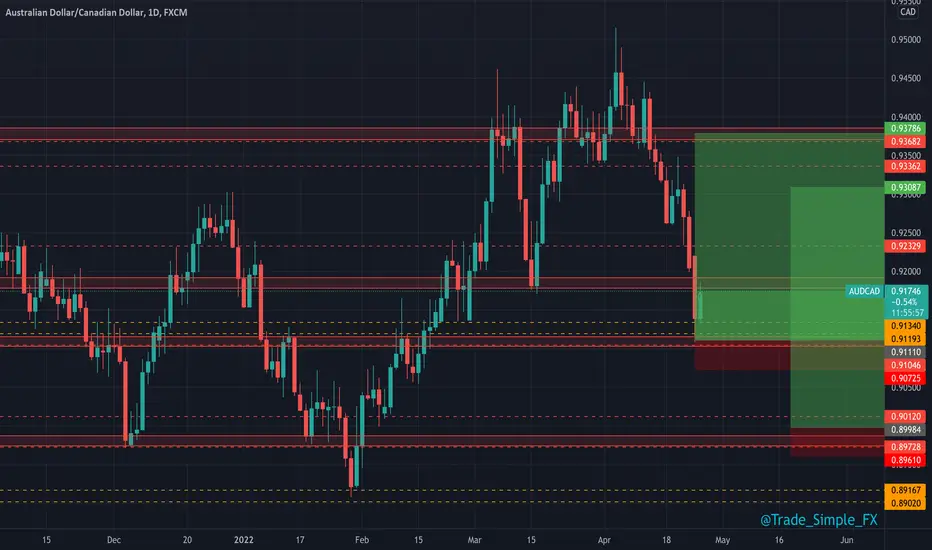
Pinned into the first support zone here, before then taking off and pushing 2R in quite quick succession.
We have this indicated zone and obviously the next trading zone to look for longs (0.90 support).
Again, not sure on how much distance this active run will see, so taking partials and trailing stops as always for position protection.
Want to find our more about us? Check out the website link below!
FREE Telegram: t.me/Trade_Simple_FX
Website - stan.store/TradeSimpleFX
Instagram: instagram.com/trade_simple_fx
e-Mail: info@tradesimplefx.com
FREE Telegram: t.me/Trade_Simple_FX
Website - stan.store/TradeSimpleFX
Instagram: instagram.com/trade_simple_fx
e-Mail: info@tradesimplefx.com
Disclaimer
The information and publications are not meant to be, and do not constitute, financial, investment, trading, or other types of advice or recommendations supplied or endorsed by TradingView. Read more in the Terms of Use.