Here’s a perfect example of why following the rules matters.
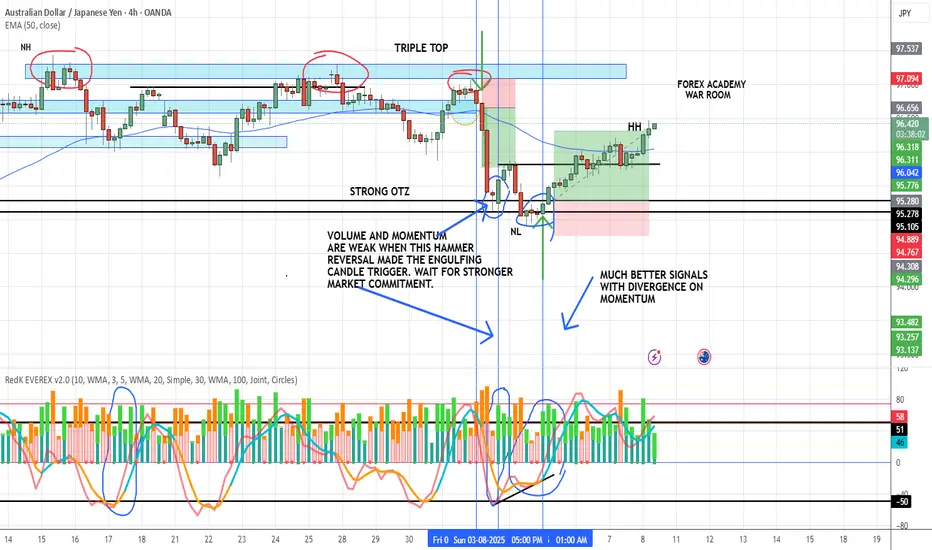
The first setup was a strong hammer reversal right after an impulsive move to the downside (which we also traded). We got a clean engulfing candle and volume was decent…
But — both momentum lines must be hooking in our favor for confirmation. In this case, one was and one was not.
Daily chart was also in a downtrend but hitting support
So not bad, but not great
✅ Discipline says: Pass.
The very next day, we got a better setup:
All VMS rules met (Volume, Momentum, Structure)
Bonus: Momentum divergence in our favor
That’s the power of combining volume and momentum with structure — it filters out the “almost” trades and keeps us focused on the high-probability setups.
Disclaimer: This is for educational purposes only — not financial advice. Always do your own research, practice extensively, and use proper risk management before trading live.
Disclaimer
The information and publications are not meant to be, and do not constitute, financial, investment, trading, or other types of advice or recommendations supplied or endorsed by TradingView. Read more in the Terms of Use.
Disclaimer
The information and publications are not meant to be, and do not constitute, financial, investment, trading, or other types of advice or recommendations supplied or endorsed by TradingView. Read more in the Terms of Use.