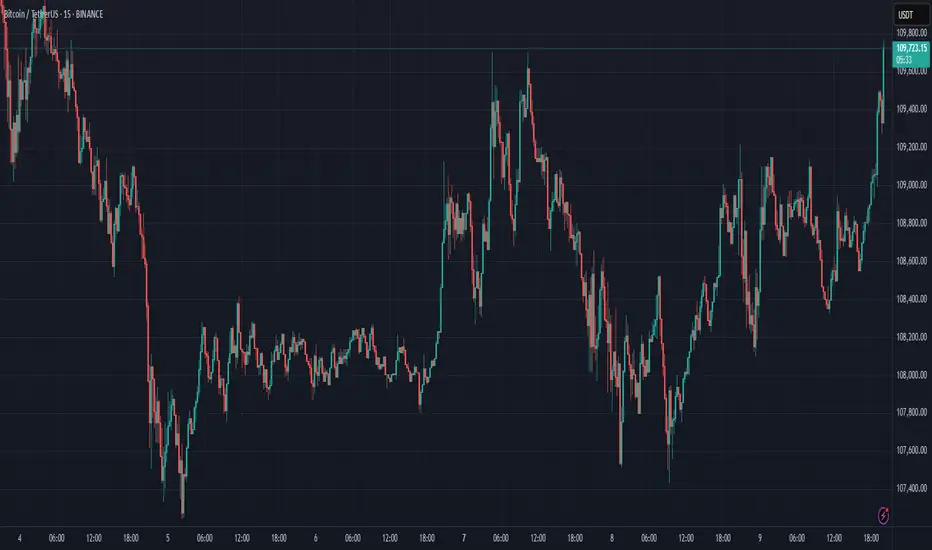
1. Bulls Pushed into Supply
After a sharp rally from the demand cluster around 108,600–108,900 (see the green/blue ZoneX blocks), BTCUSDT has powered straight into the upper red supply zone, aligning perfectly with a previous high.
This area isn’t just technical resistance — it’s where institutional players tend to absorb late longs and test true buying conviction. Recent wicks into this zone suggest the first signs of exhaustion or aggressive selling.
2. Liquidity Pools and the Battle for Control
Notice how the yellow dashed line (yesterday’s high) and the red block (ZoneX supply) form a liquidity shelf. This is where both breakout buyers and aggressive shorters are active.
If bulls can establish support above this shelf, it often signals true trend continuation. If not, this same zone is primed for a fakeout reversal.
3. The VWAP/Midline Story
Below, the VWAP band and midline (dotted) tell us where fair value and market balance sit. Price spent hours consolidating here before the breakout. Any pullback into this area (around 108,900) will be a major test: will buyers defend, or will the breakout unwind?
4. Scenarios and What to Watch
Bullish scenario:
A strong close and hold above the red supply zone could unleash another wave higher, as shorts get squeezed and trend followers pile in. Watch for retests of the broken supply as new support.
Bearish scenario:
If price can’t hold above the supply zone and quickly falls back below, expect sellers to target the VWAP/midline band. A deeper flush could see a return all the way to the green demand zone.
Neutral/chop:
If price oscillates around this supply zone, expect a battle of wicks — a classic “liquidity grab” before the next directional move.
My Approach
I’m letting the zone do the talking. No FOMO at the top; I want to see if bulls can really flip this area to support.
Patience is key: I’ll trade with momentum on confirmation above, or fade a failed breakout with a tight stop.
Summary:
BTCUSDT is in a classic smart money test zone. Whoever wins this battle will set the next move — don’t trade blindly, trade with the levels the big players watch!
If you found this analysis useful, smash like and follow for more smart money zone breakdowns!
Disclaimer
The information and publications are not meant to be, and do not constitute, financial, investment, trading, or other types of advice or recommendations supplied or endorsed by TradingView. Read more in the Terms of Use.
Disclaimer
The information and publications are not meant to be, and do not constitute, financial, investment, trading, or other types of advice or recommendations supplied or endorsed by TradingView. Read more in the Terms of Use.
