Hello everyone, this is Dark Analysis.
### **📌 Latest Technical Outlook**
1. **Previous Analysis Hit Target**:
- Support at **$2,435.32** held as expected, and the target was achieved.
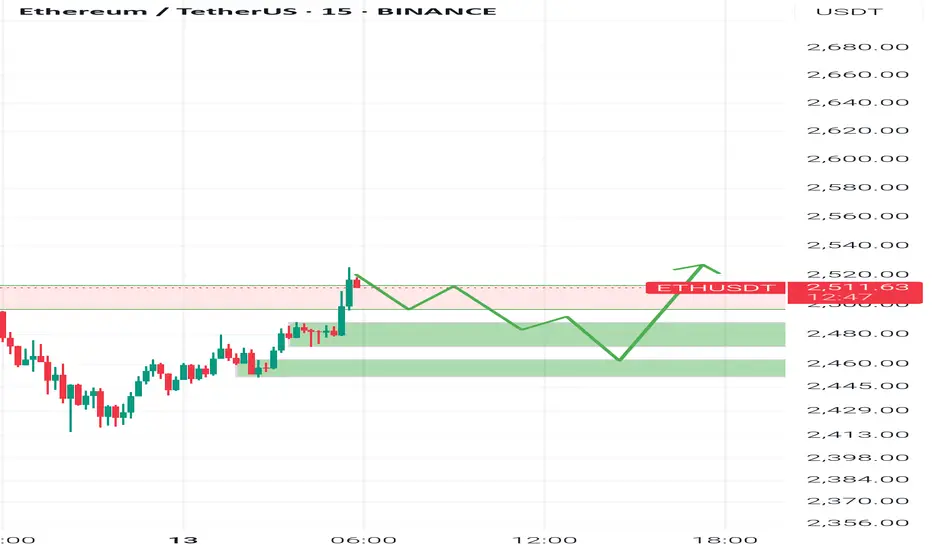
- Break above **$2,513.43** has shifted bias to **bullish**.
2. **Current Price Action**:
- **Bullish Scenario**: Price is likely to hunt liquidity in the demand zone near **$2,463.45**.
- *Entry (Long)*: Only if a **reversal pattern** (e.g., Bullish Engulfing, Hammer) forms here.
- *Stop Loss*: **$2,449.44** (below recent swing low).
- **Caution**: No long trades if price approaches the zone with **weak bullish momentum**.
3. **Bearish Invalidation**:
- Shorts are **off the table** unless:
- A new **supply zone** forms.
- Price shows **weakness after retesting highs** (e.g., lower high + RSI divergence).
---
### **🎯 Trade Plan (If Setup Triggers)**
- **Entry Zone**: **$2,463.45** (Demand Area)
- **Confirmation**: Reversal candle + volume spike.
- **Target**: Previous high (**$2,513.43**) → **$2,550** (next liquidity zone).
- **Stop Loss**: **$2,449.44** (tight risk management).
---
### **📊 Key Chart Levels**
- **Support**: $2,463.45 (Demand Zone) → $2,435.32 (Strong Base)
- **Resistance**: $2,513.43 (Breakout Confirmation) → $2,550 (Next Target)
---
### **⚠️ Critical Reminders**
- **No Longs on Strong Momentum Dips** (Wait for structured pullbacks).
- **Avoid Shorts Unless New Supply Forms** (Trend is bullish above $2,513.43).
- **Always Use Stops** (Protect capital in volatile moves).
---
**📌 Final Note**: *"Trade the structure, not the noise!"* Updates will follow if the scenario changes.
**🔍 Follow for real-time insights!**
Disclaimer
The information and publications are not meant to be, and do not constitute, financial, investment, trading, or other types of advice or recommendations supplied or endorsed by TradingView. Read more in the Terms of Use.
Disclaimer
The information and publications are not meant to be, and do not constitute, financial, investment, trading, or other types of advice or recommendations supplied or endorsed by TradingView. Read more in the Terms of Use.
