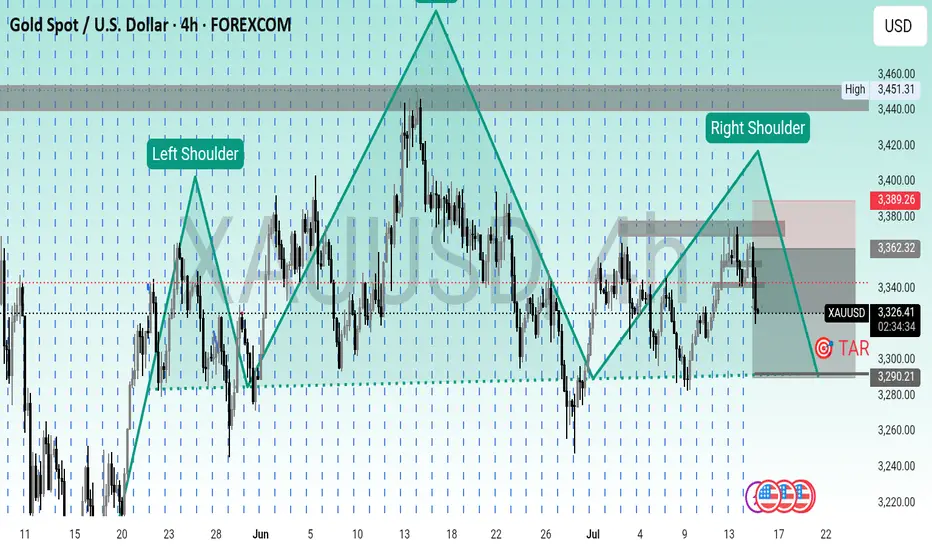
⏱ 4H Timeframe | Bearish Bias | Precision Setup
💡 Pattern Formed: Head & Shoulders
🔻 Market rejecting at right shoulder zone with bearish confirmation
---
🔽 Entry Level (Sell):
🟤 3,360 – 3,365 (Right shoulder rejection zone / supply area)
🛑 Stop-Loss (SL):
🔴 3,390 (Above the right shoulder + structure invalidation)
🎯 Take-Profit (TP):
🟢 3,210 – 3,200 (Measured move target + POI support zone)
📊 Risk:Reward Ratio:
✅ Approx. 1:4 — High probability setup
Disclaimer
The information and publications are not meant to be, and do not constitute, financial, investment, trading, or other types of advice or recommendations supplied or endorsed by TradingView. Read more in the Terms of Use.
Disclaimer
The information and publications are not meant to be, and do not constitute, financial, investment, trading, or other types of advice or recommendations supplied or endorsed by TradingView. Read more in the Terms of Use.