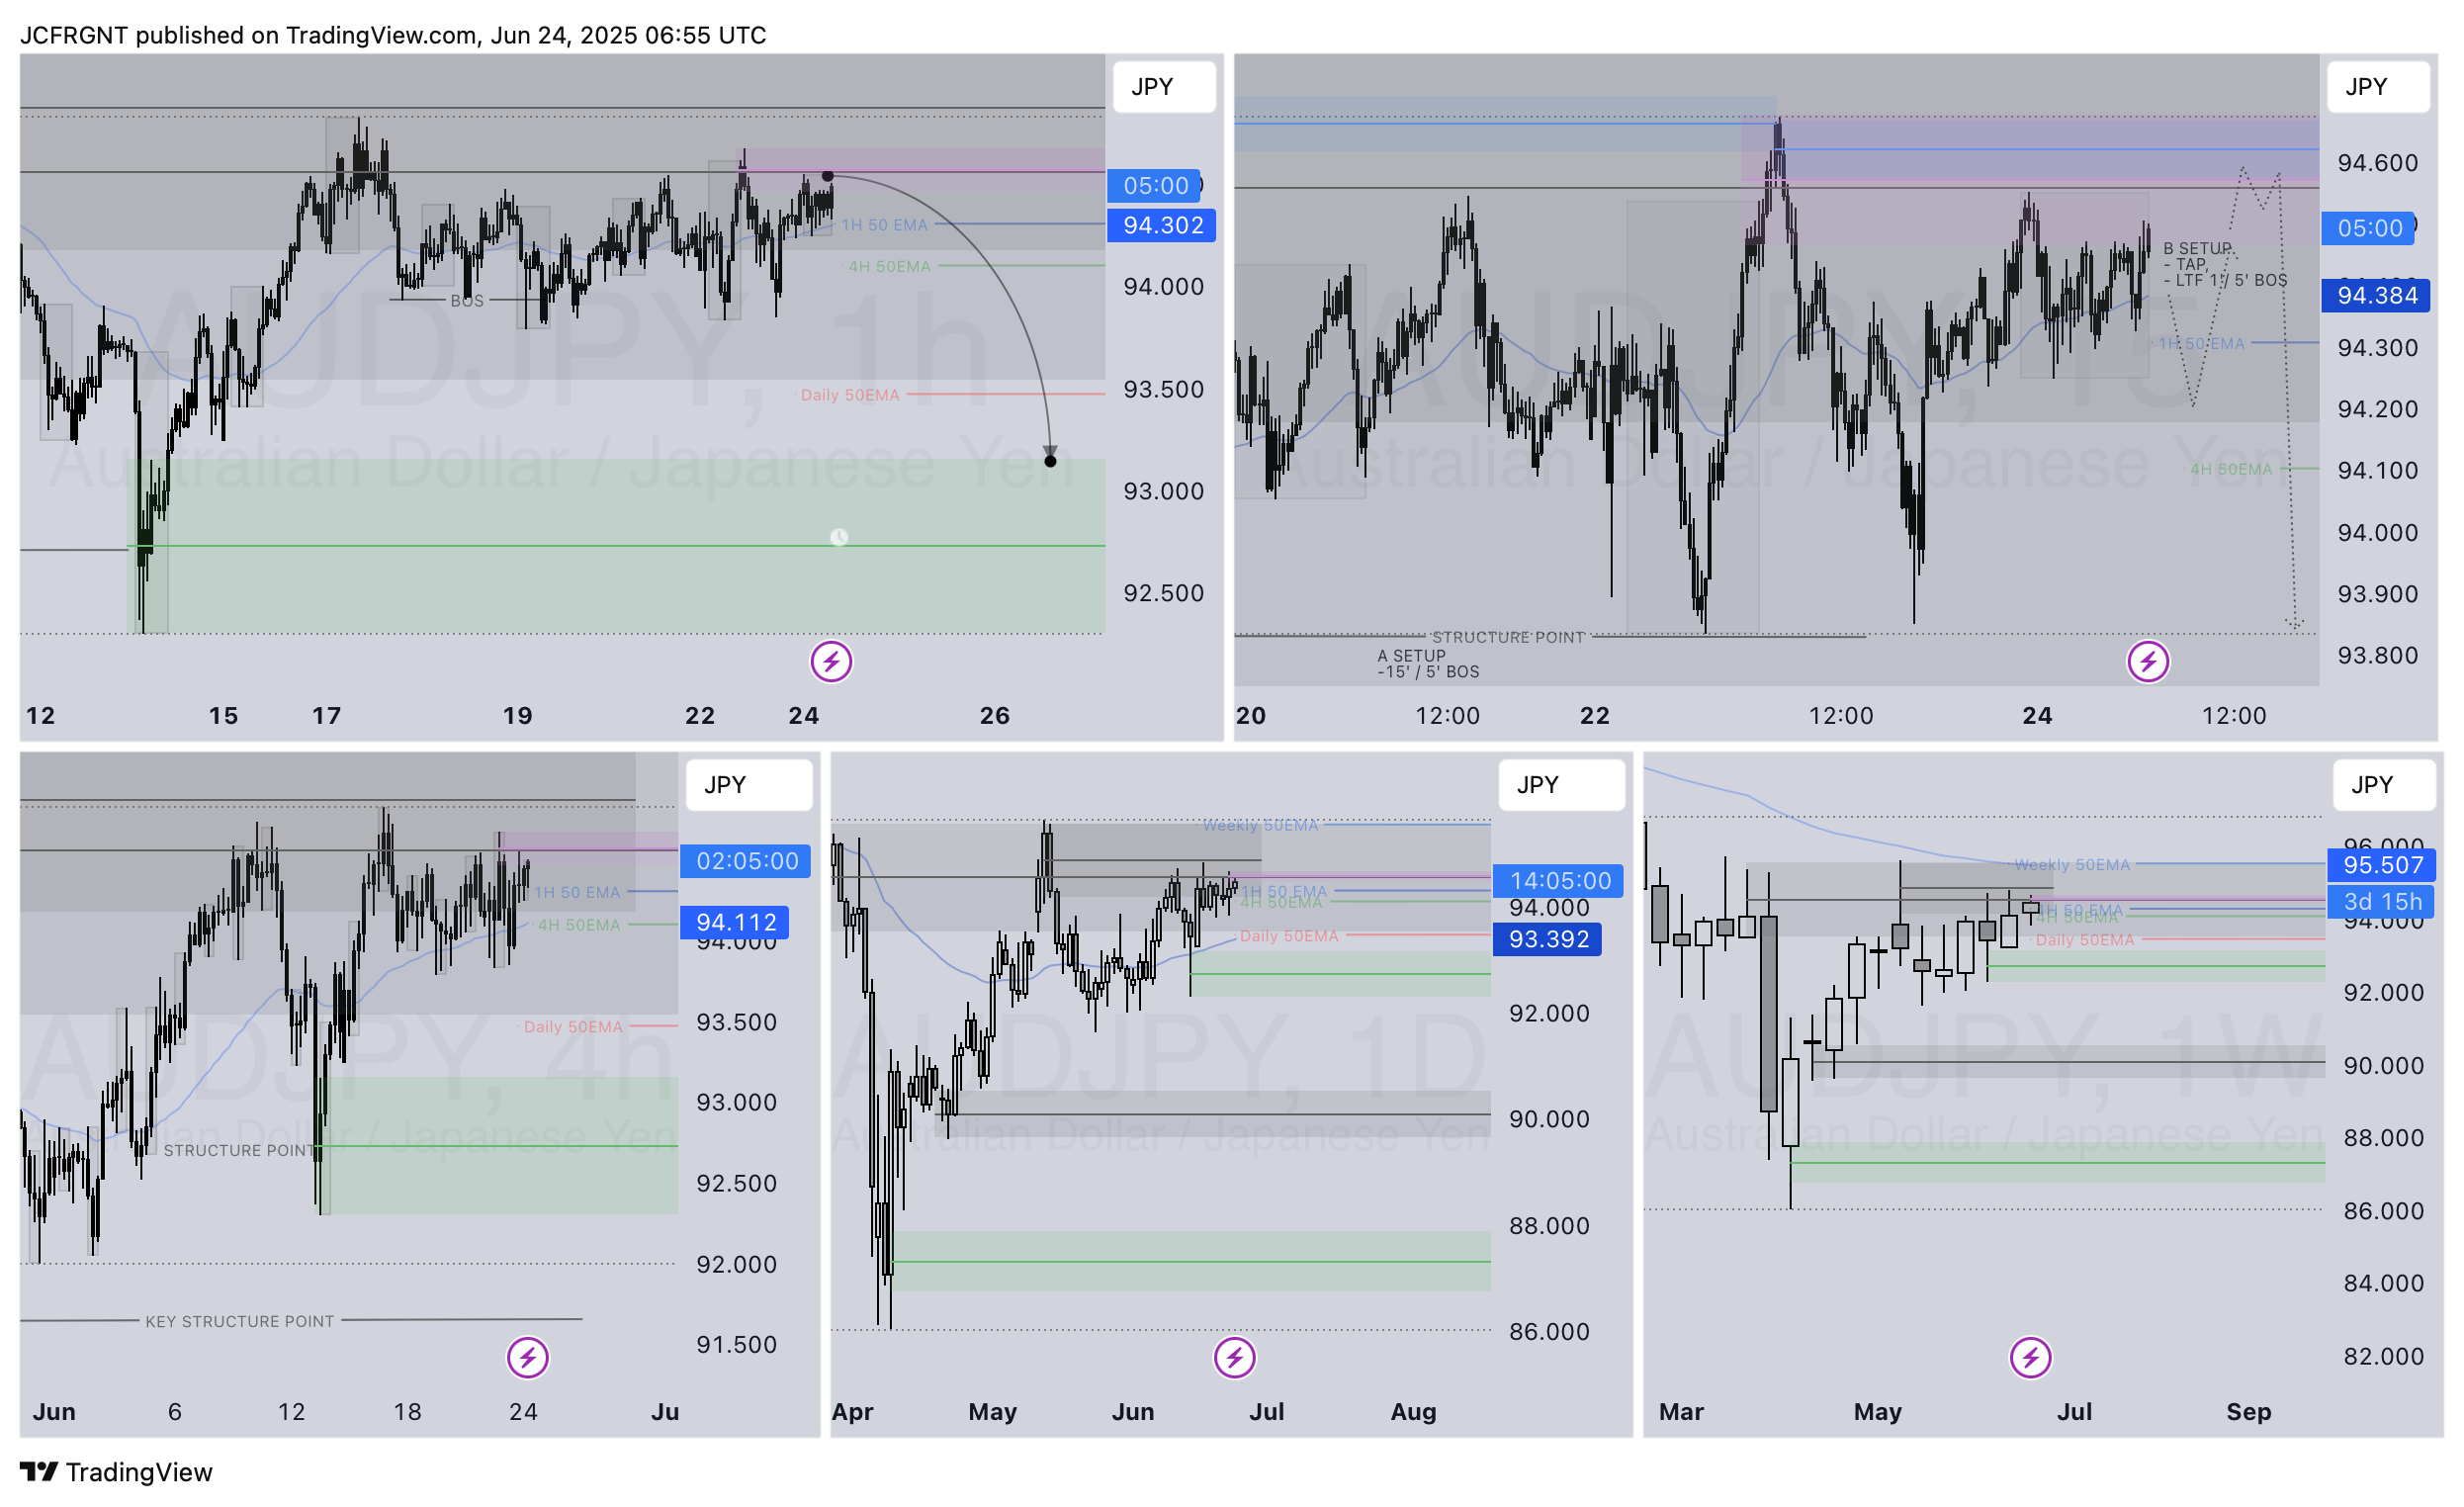
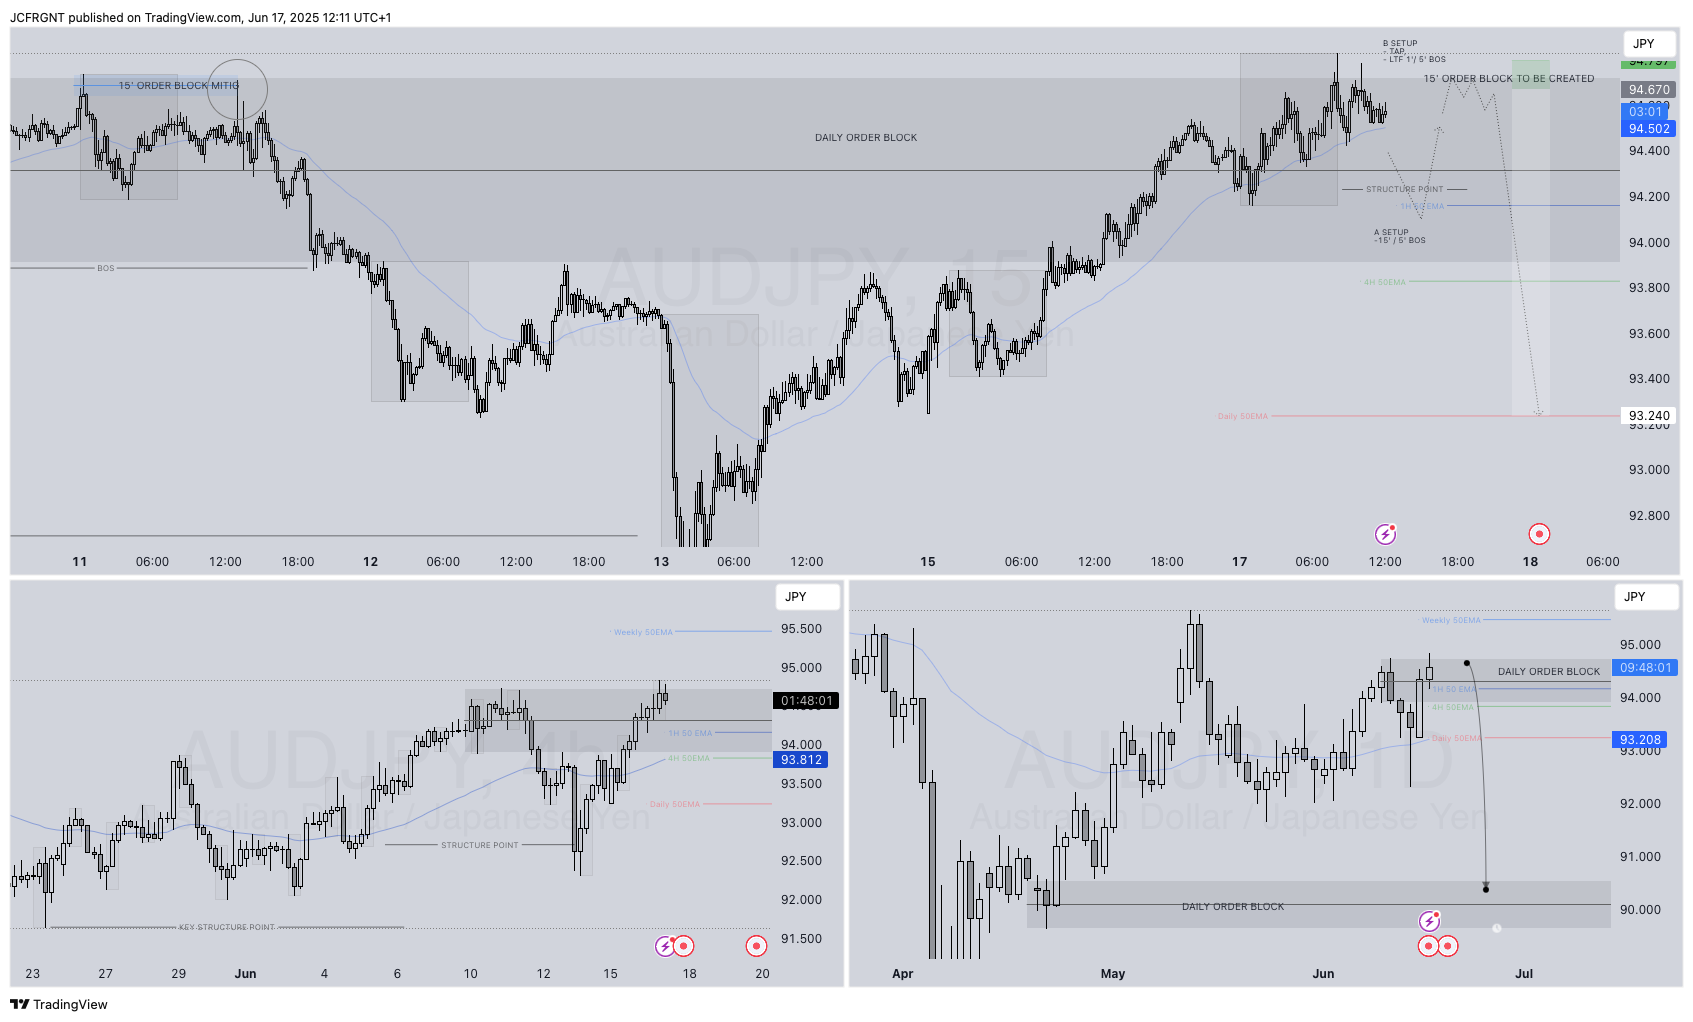
Welcome back to another FRGNT chart update📈 Diving into some Forex setups using predominantly higher time frame order blocks alongside confirmation breaks of structure.
Let’s see what price action is telling us today! 👀
💡Here are some trade confluences📝
✅Weekly Order Block Identified ✅Daily Order block identified ✅4H Order Block identified ✅15' Order block identified
🔑 Remember, to participate in trading comes always with a degree of risk, therefore as professional risk managers it remains vital that we stick to our risk management plan as well as our trading strategies.
📈The rest, we leave to the balance of probabilities.
💡Fail to plan. Plan to fail. 🏆It has always been that simple.
❤️Good luck with your trading journey, I shall see you at the very top.
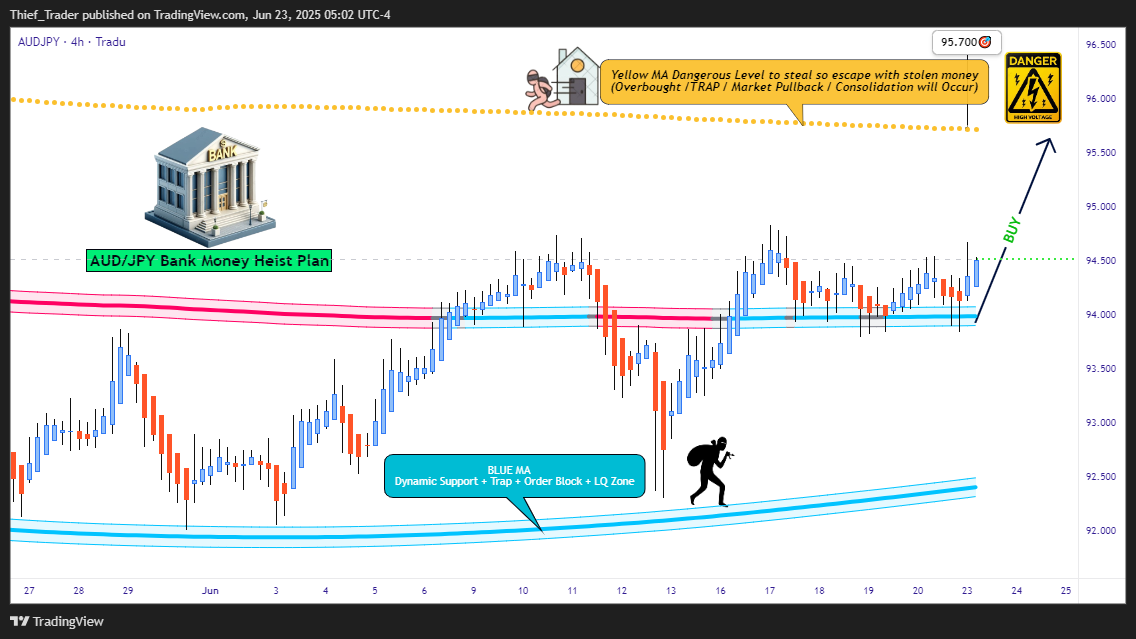
AUDJPY 🦹♂️ ATTENTION ALL MARKET PIRATES! To the Profit Raiders & Risk-Takers! 🌏💣
Using our 🔥Thief Trading Tactics🔥 (a deadly combo of carry trade flows + risk sentiment + institutional traps), we're executing a bullish raid on AUD/JPY—this is not advice, just a strategic heist plan for traders who play by their own rules.
📈 THE LOOTING BLUEPRINT (LONG ENTRY PLAN) 🎯 Treasure Zone: 92.700 (or escape earlier if bears attack) 💎 High-Reward Play: Neutral turning bullish - trap for yen bulls 👮♂️ Cop Trap: Where bears get squeezed at support
🔑 ENTRY RULES: "Vault Unlocked!" – Grab bullish loot on pullbacks (15-30min TF) Buy Limit Orders near swing lows OR Market Orders with tight stops Aggressive? Enter at market but watch JPY news
🚨 STOP LOSS (Escape Plan): Thief SL at nearest swing low (4H chart) ⚠️ Warning: "Skip this SL? Enjoy donating to yen bulls."
🎯 TARGETS: Main Take-Profit: 92.700 Scalpers: Ride the Asian session momentum
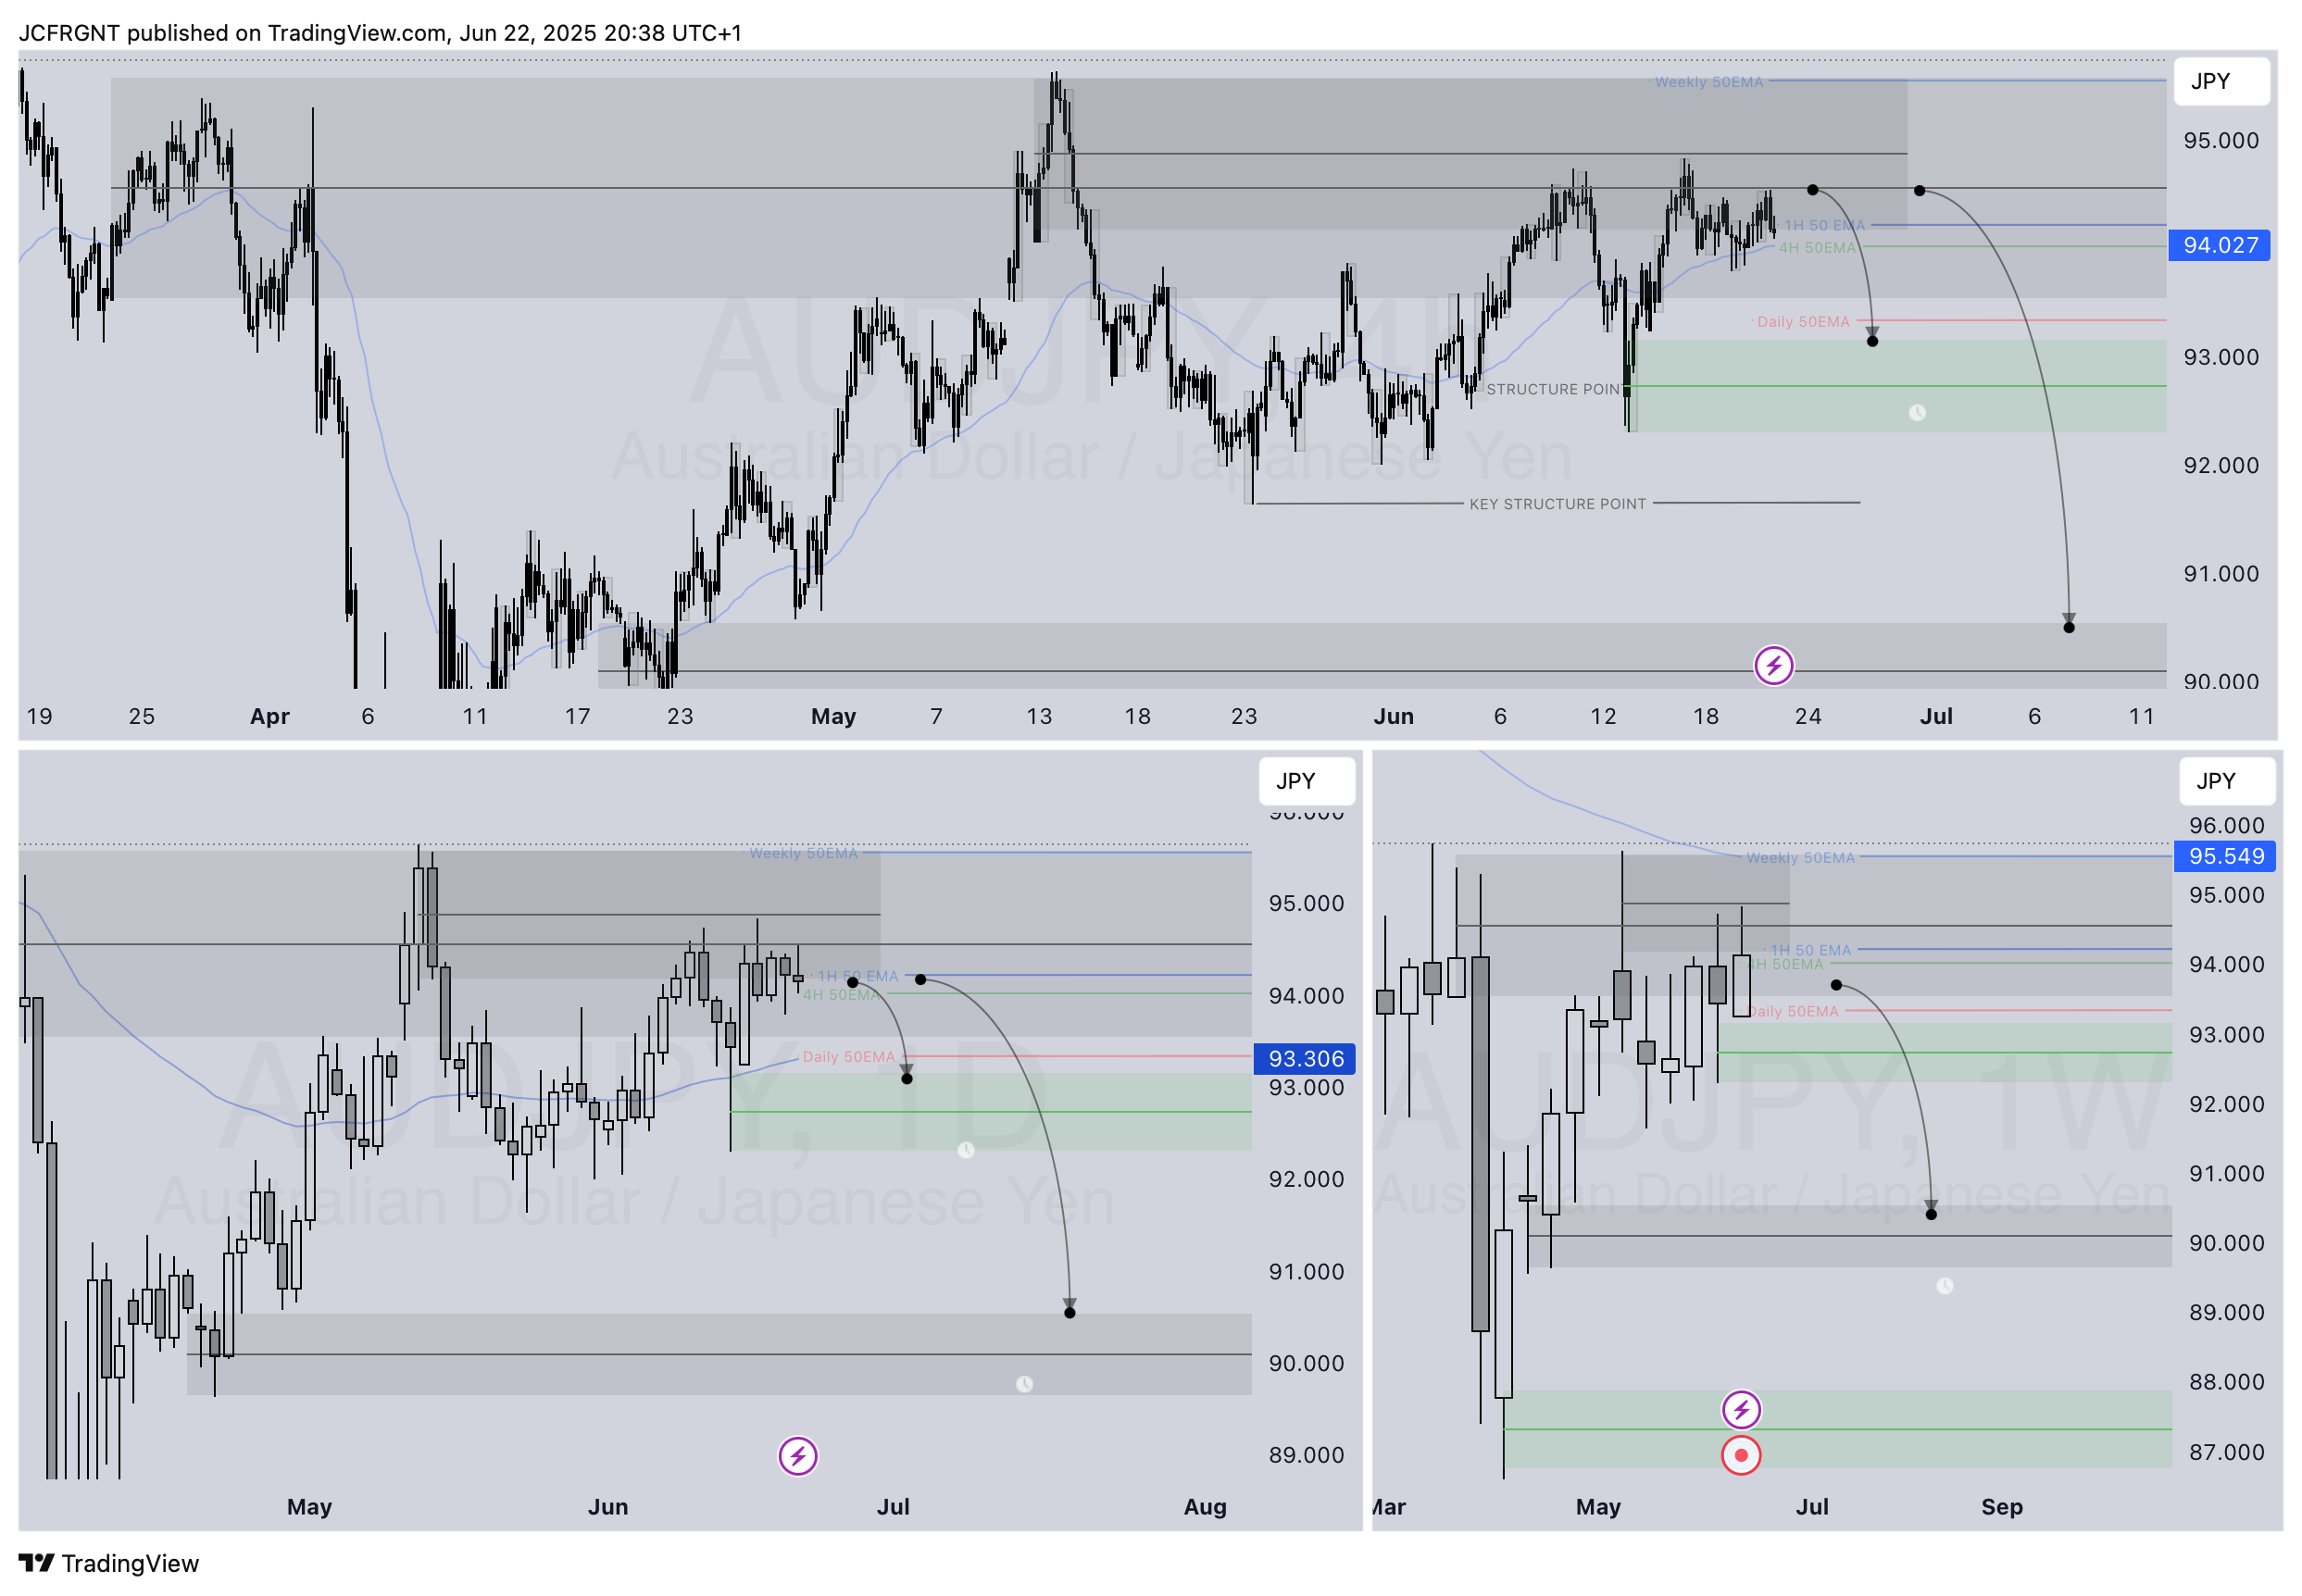
AUDJPY AUDJPY WEEKLY HIGHER TIME FRAME FORECAST Q2 W26 Y25
Professional Risk Managers👋
Welcome back to another FRGNT chart update📈 Diving into some Forex setups using predominantly higher time frame order blocks alongside confirmation breaks of structure.
Let’s see what price action is telling us today! 👀
💡Here are some trade confluences📝
✅Weekly Order Block Identified ✅Daily Order block identified ✅4H Order Block identified
🔑 Remember, to participate in trading comes always with a degree of risk, therefore as professional risk managers it remains vital that we stick to our risk management plan as well as our trading strategies.
📈The rest, we leave to the balance of probabilities.
💡Fail to plan. Plan to fail. 🏆It has always been that simple.
❤️Good luck with your trading journey, I shall see you at the very top.
Welcome back to another FRGNT chart update📈 Diving into some Forex setups using predominantly higher time frame order blocks alongside confirmation breaks of structure.
Let’s see what price action is telling us today! 👀
💡Here are some trade confluences📝
✅Weekly Order block rejection ✅15' Order block to be confirmed ✅4H Order block ✅1H Order block
🔑 Remember, to participate in trading comes always with a degree of risk, therefore as professional risk managers it remains vital that we stick to our risk management plan as well as our trading strategies.
📈The rest, we leave to the balance of probabilities.
💡Fail to plan. Plan to fail. 🏆It has always been that simple.
❤️Good luck with your trading journey, I shall see you at the very top.
Welcome back to another FRGNT chart update📈 Diving into some Forex setups using predominantly higher time frame order blocks alongside confirmation breaks of structure.
Let’s see what price action is telling us today! 👀
💡Here are some trade confluences📝
✅Weekly Order block rejection ✅15' Order block ✅Daily order block identified
🔑 Remember, to participate in trading comes always with a degree of risk, therefore as professional risk managers it remains vital that we stick to our risk management plan as well as our trading strategies.
📈The rest, we leave to the balance of probabilities.
💡Fail to plan. Plan to fail. 🏆It has always been that simple.
❤️Good luck with your trading journey, I shall see you at the very top.