AUDJPY 💼 AUDJPY LONG & SHORT – WEEKLY FORECAST Q3 | W29 | Y25
📊 MARKET STRUCTURE SNAPSHOT
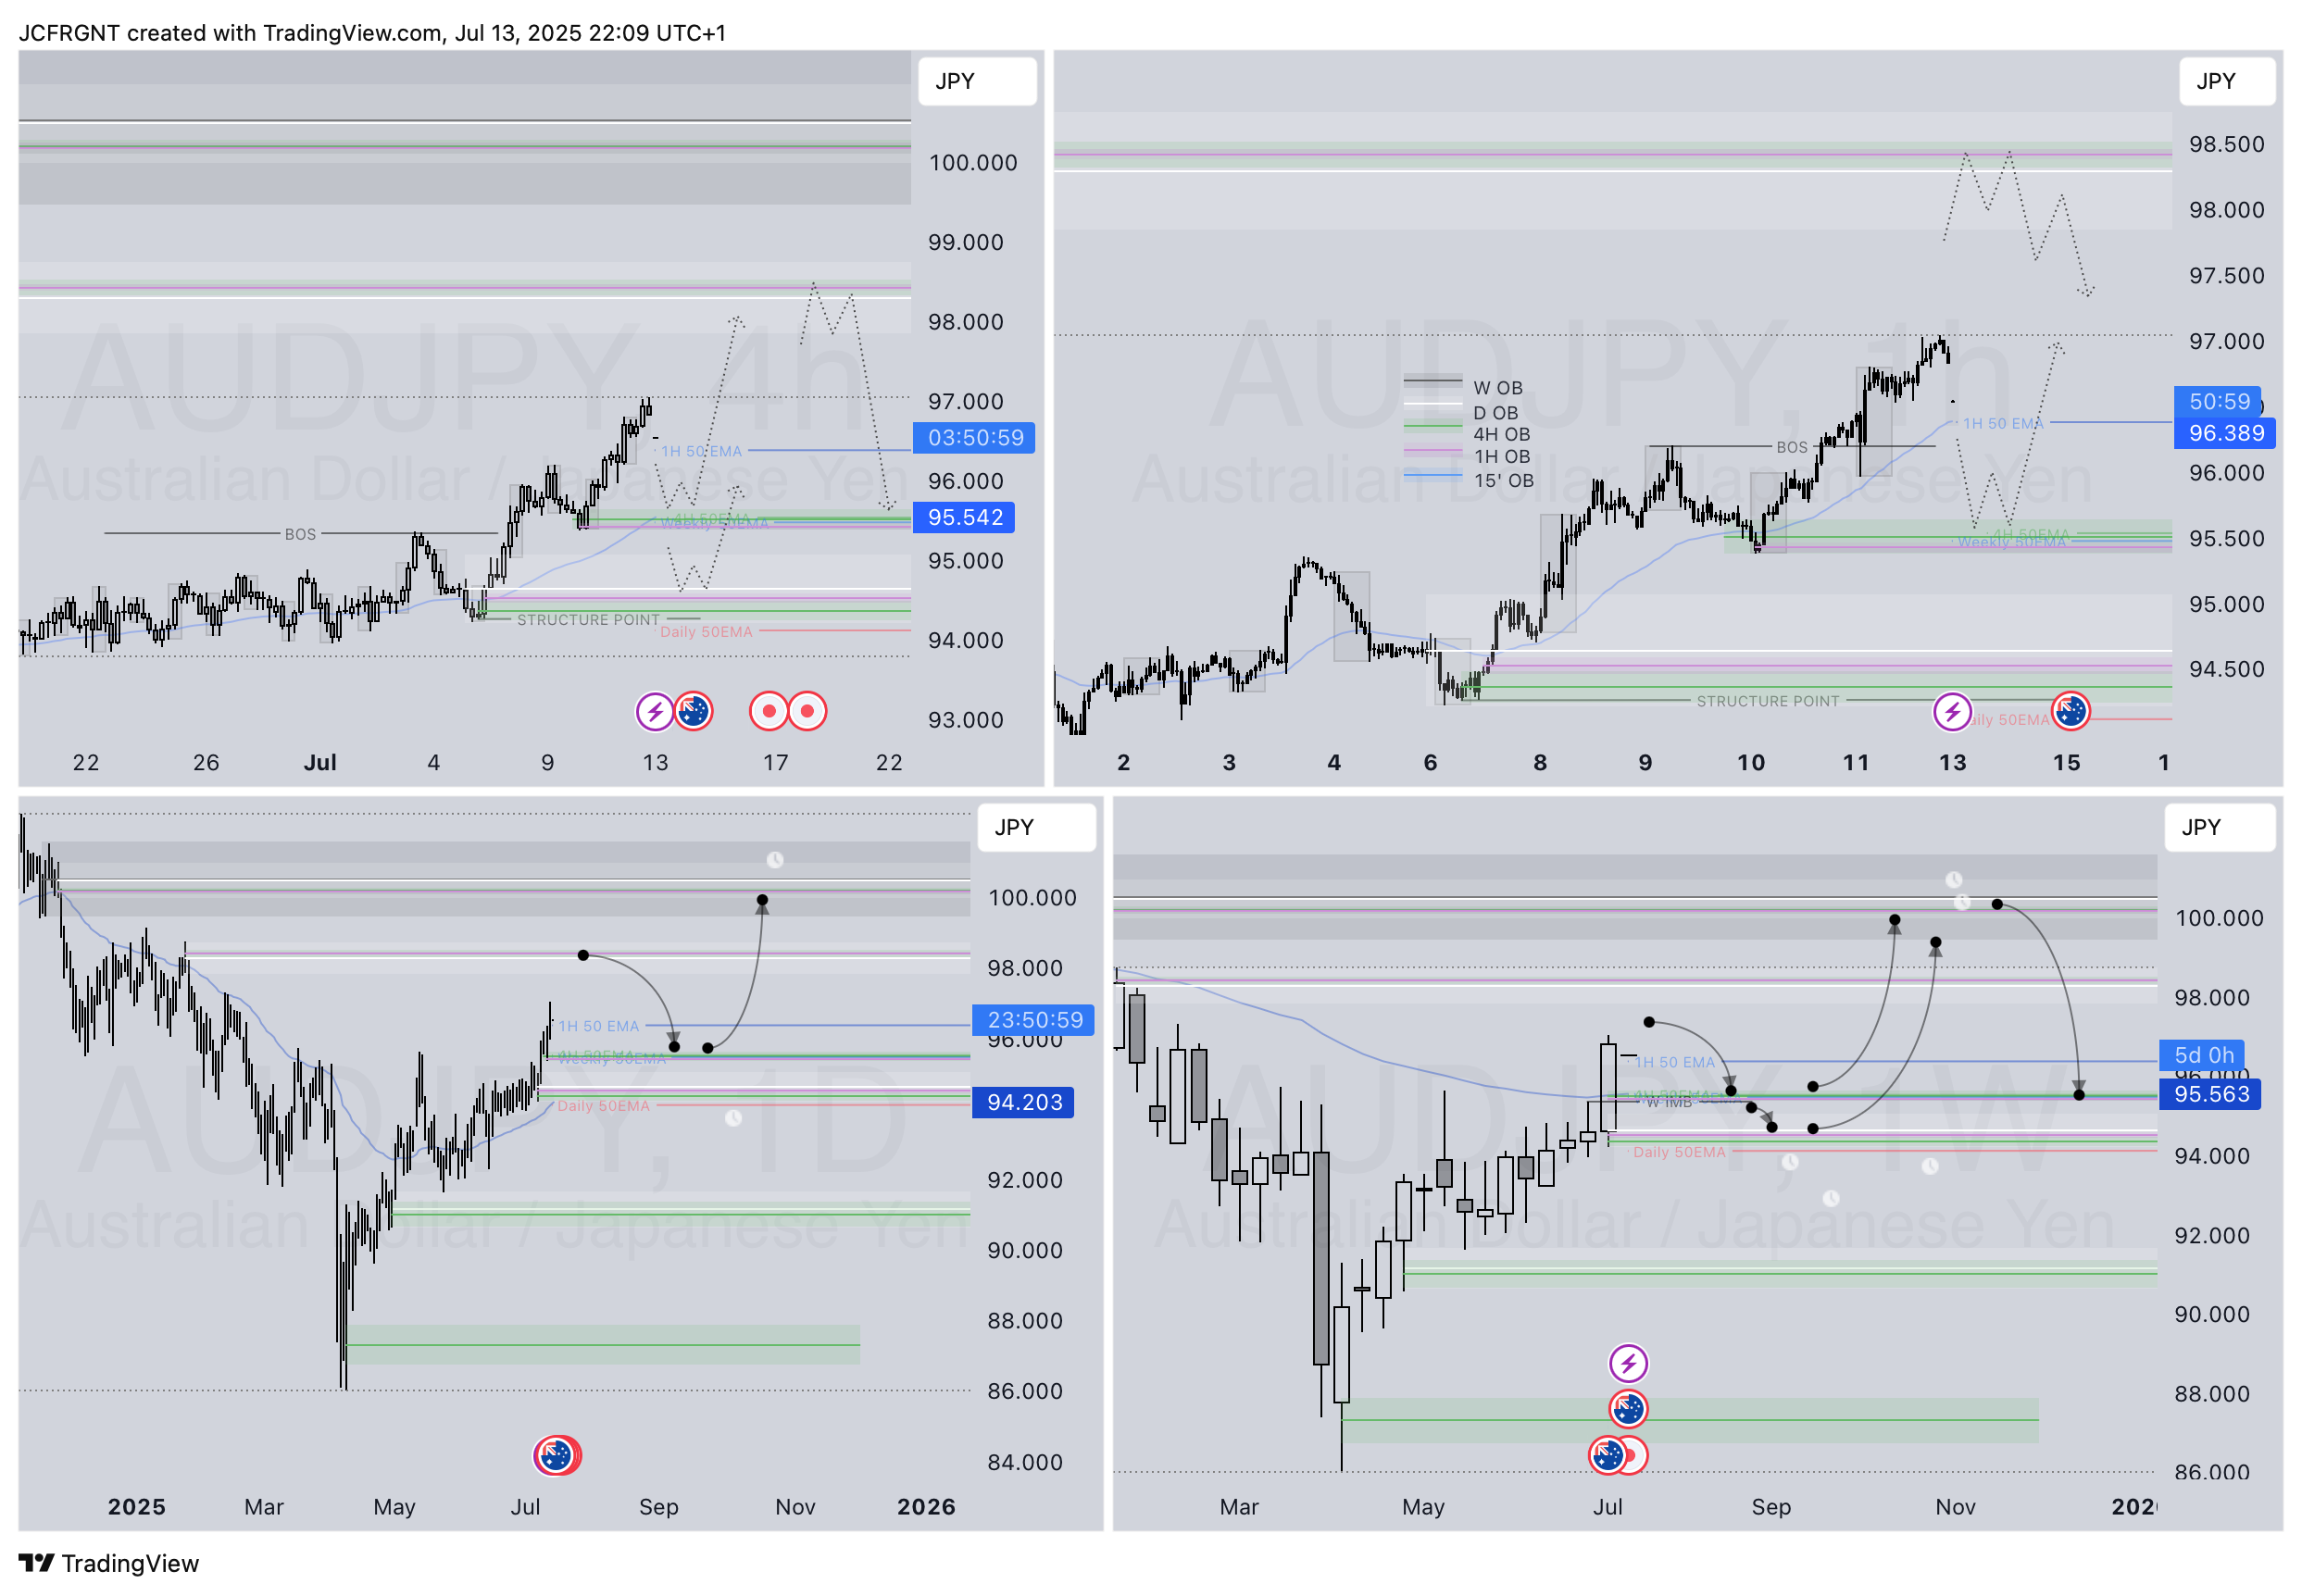
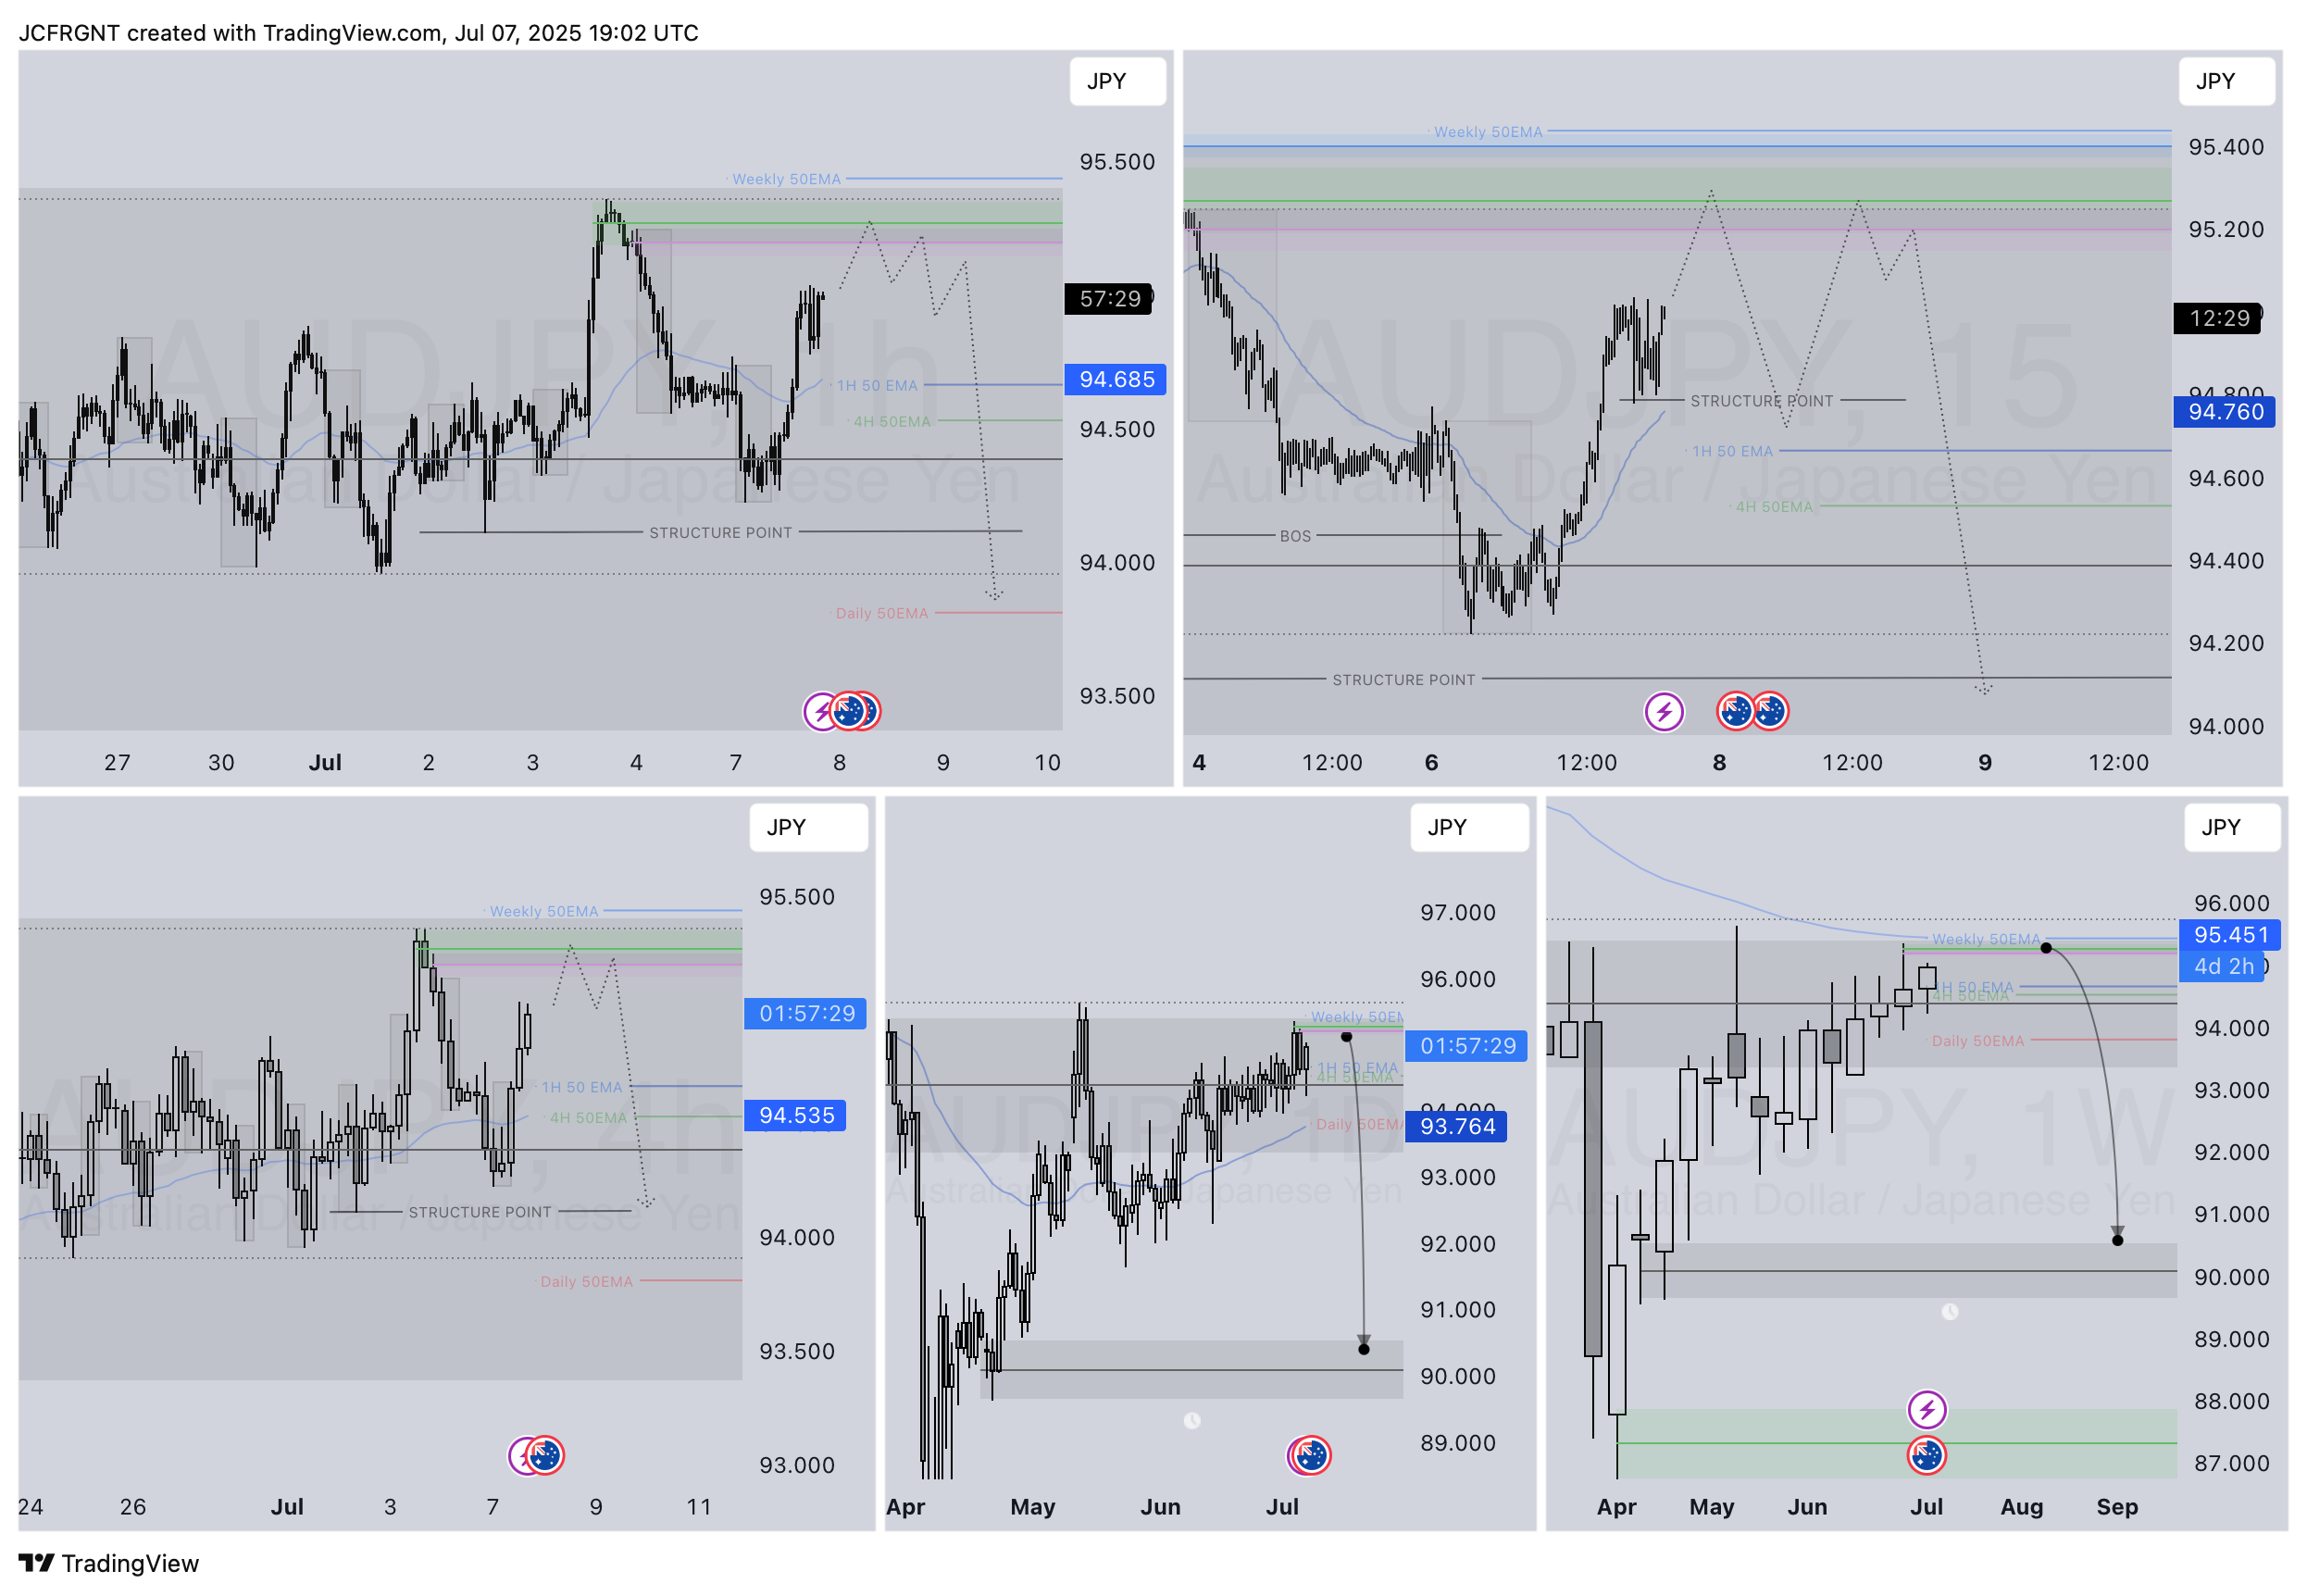
AUD JPY is currently reaching for a key higher time frame supply zone, looking for price action to show weakness at premium levels. Structure and momentum are now aligning for a short opportunity backed by multi-timeframe confluence.
🔍 Confluences to Watch 📝
✅ Daily Order Block (OB) Looking for Strong reaction and early signs of distribution.
✅ 4H Order Block Break of internal structure (iBoS) confirms a short-term bearish transition.
✅ 1H Order Block
📈 Risk Management Protocols
🔑 Core principles: Max 1% risk per trade Only execute at pre-identified levels Use alerts, not emotion Stick to your RR plan — minimum 1:2 🧠 You’re not paid for how many trades you take, you’re paid for how well you manage risk.
🧠 Weekly FRGNT Insight "Trade what the market gives, not what your ego wants."
Stay mechanical. Stay focused. Let the probabilities work.
🏁 Final Thoughts from FRGNT
📌 The structure is clear. The confluences are stacked. Let execution follow discipline, not emotion.
Welcome back to another FRGNT chart update📈 Diving into some Forex setups using predominantly higher time frame order blocks alongside confirmation breaks of structure.
Let’s see what price action is telling us today! 👀
🔑 Remember, to participate in trading comes always with a degree of risk, therefore as professional risk managers it remains vital that we stick to our risk management plan as well as our trading strategies.
📈The rest, we leave to the balance of probabilities.
💡Fail to plan. Plan to fail. 🏆It has always been that simple.
❤️Good luck with your trading journey, I shall see you at the very top.
Welcome back to another FRGNT chart update📈 Diving into some Forex setups using predominantly higher time frame order blocks alongside confirmation breaks of structure.
Let’s see what price action is telling us today! 👀
💡Here are some trade confluences📝
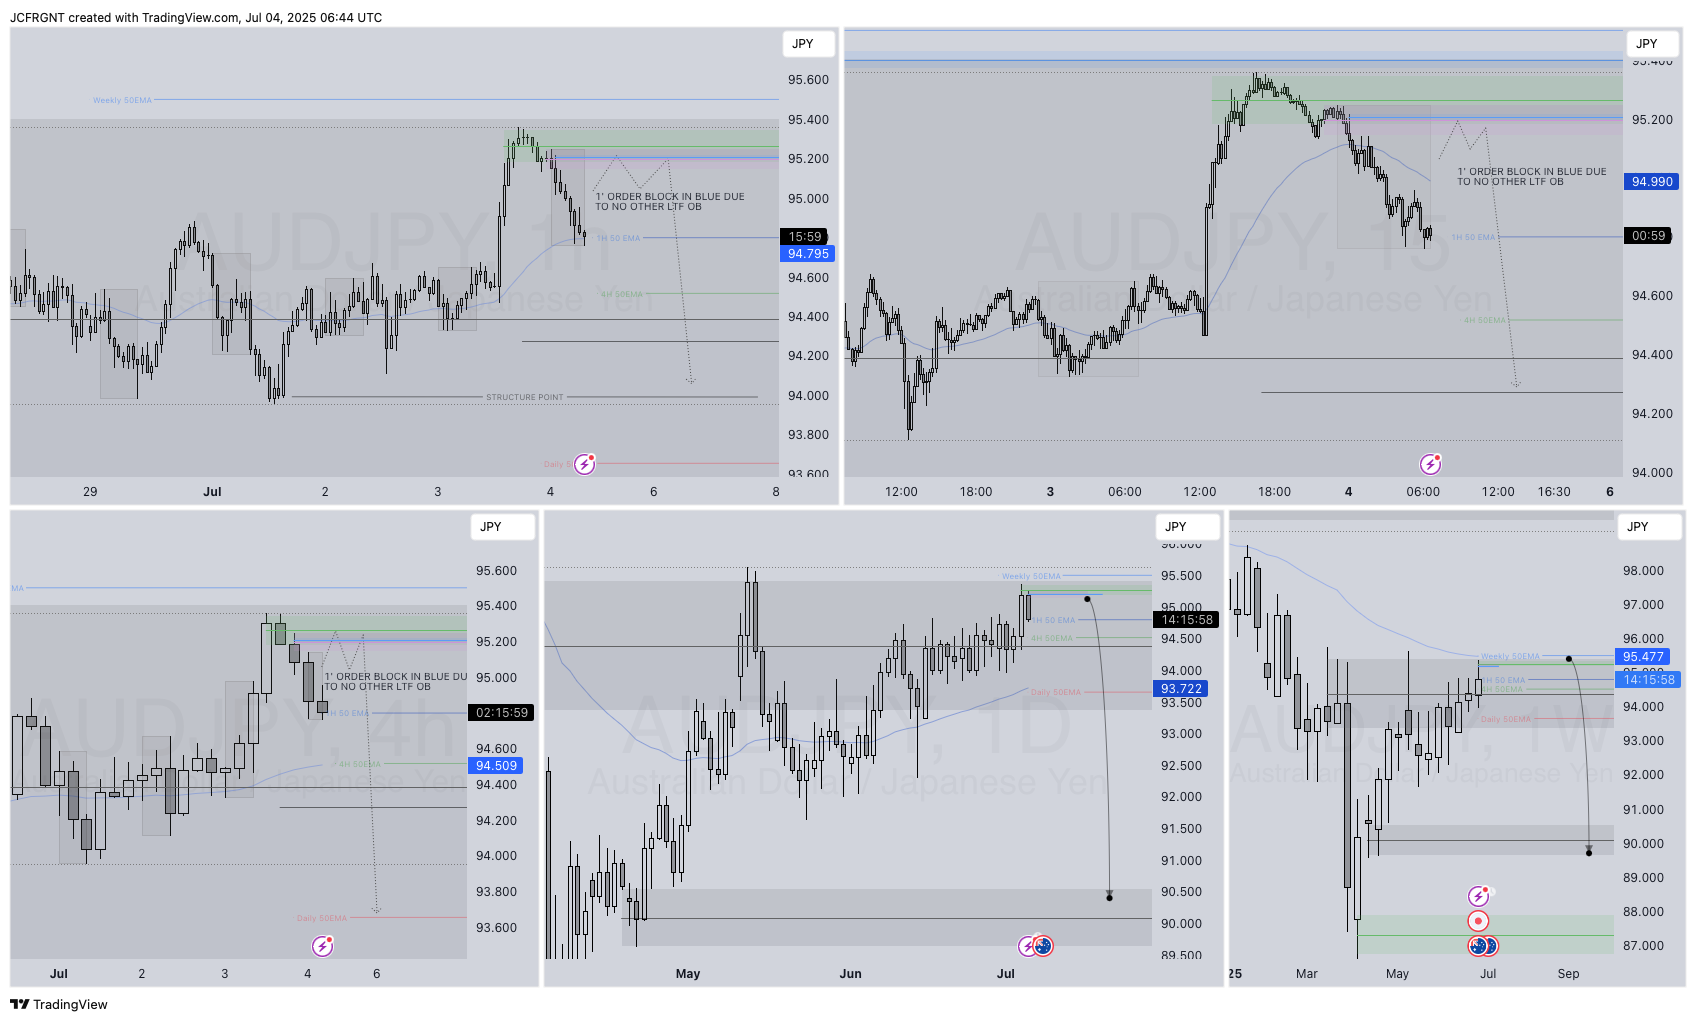
✅Weekly Order Block Identified ✅Daily Order block identified ✅4H Order Block identified ✅15' Order block identified
🔑 Remember, to participate in trading comes always with a degree of risk, therefore as professional risk managers it remains vital that we stick to our risk management plan as well as our trading strategies.
📈The rest, we leave to the balance of probabilities.
💡Fail to plan. Plan to fail. 🏆It has always been that simple.
❤️Good luck with your trading journey, I shall see you at the very top.
Welcome back to another FRGNT chart update📈 Diving into some Forex setups using predominantly higher time frame order blocks alongside confirmation breaks of structure.
Let’s see what price action is telling us today! 👀
💡Here are some trade confluences📝
✅Weekly Order Block Identified ✅Daily Order block identified ✅4H Order Block identified ✅15' Order block identified
🔑 Remember, to participate in trading comes always with a degree of risk, therefore as professional risk managers it remains vital that we stick to our risk management plan as well as our trading strategies.
📈The rest, we leave to the balance of probabilities.
💡Fail to plan. Plan to fail. 🏆It has always been that simple.
❤️Good luck with your trading journey, I shall see you at the very top.