
A trade we took on the 29th of October, which gave us the perfect possible trading setup.
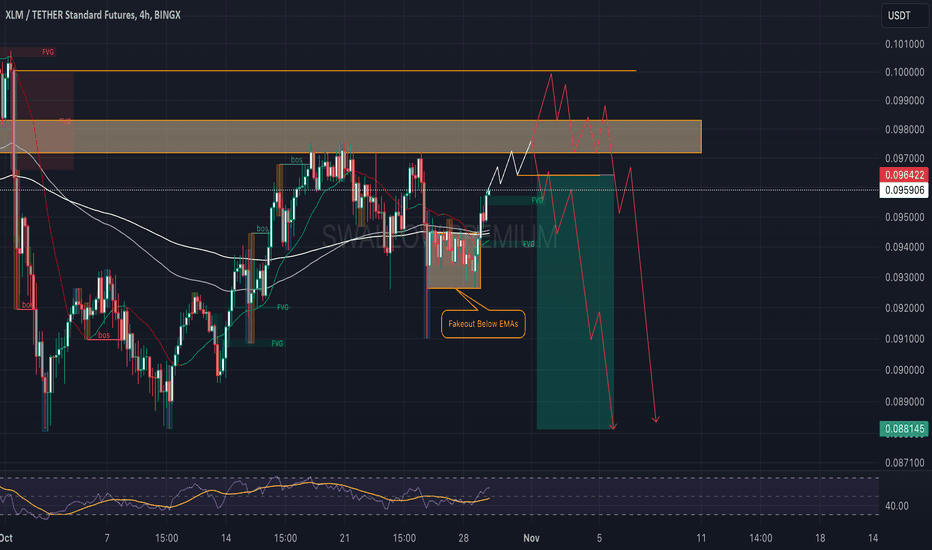
What were the signs that gave us this possible movement to catch?
Stellar coin made a notable move toward the upper resistance zone (orange-colored zone) following a fakeout below the 100 and 200 EMAs.
On October 25th, when price first dropped below the EMAs, it faced a strong rejection at the resistance level, causing a quick dip to grab liquidity. This was followed by a recovery candle, signaling that buyers were defending this zone, making it harder for sellers to push the price lower. While trading under the 100 and 200 EMAs, we observed a breakout above them, creating an ideal setup to fill the Fair Value Gap (FVG) left by a larger red candle on October 25th.
Once the 4-hour candle closed successfully above the 200 EMA, buyers took control, securing the zone and indicating a likely move toward the resistance level.
The price subsequently reached the resistance zone, also filling the Fair Value Gap. At this point, resistance came into play, and sellers began pushing back toward the EMAs for a re-test. This re-test of broken zones is common and logical, often called a “confirmation re-test."
Swallow Team
🚨 Authentic Traders
⚡️ Short-Term + Mid-Term Trades
Keep an eye on us and you will not regret it. 😉
Telegram: t.me/+fiEDSn7M9pJkODA0
⚡️ Short-Term + Mid-Term Trades
Keep an eye on us and you will not regret it. 😉
Telegram: t.me/+fiEDSn7M9pJkODA0
Disclaimer
The information and publications are not meant to be, and do not constitute, financial, investment, trading, or other types of advice or recommendations supplied or endorsed by TradingView. Read more in the Terms of Use.